Showing posts with label chocolate. Show all posts

Monday, November 12, 2012

・Wookiee Cookies ・

เนื่องจากว่าเจ้าของบล็อกมีคนรู้จักคนนึงซึ่งเนิ๊ร์ด เนิร์ด
เขาเป็นเนิร์ดหนังสตาร์วอส์ การ์ตูนมาร์เวล ซูเปอร์ฮีโร่ต่างๆ แล้วก็พาลมาติดเจ้าของบล็อกด้วย
ณ วันที่เจ้าของบล็อกได้พานพบกับ cookbook เล่มนี้ ก็เลยถึงกับหัวเราะอยู่คนเดียวในร้านหนังสือ
มันคืิอ The Star Wars Cookbook, Wookiee Cookies and Other Galactic Recipes

I knew someone that is a hugh fan of Marvel's super heroes and Star Wars.
He's so crazy about it and that craze is like.. osmosis to me and makes me become a Star Wars geek. Haha.. (but I love it :) )
So one day, I found this cookbook in the book shop, and it reminds me of my friend.
This book is so cute I just can't stop laughing just looking through the book.

I tried Wookiee Cookies menu or to be easy it's a double chocolate chips cookies that contain both milk and semi-sweet chocolate chips.

I make 3 dozens from this recipe ans the outcome is larger than the photo in the book.

ถ้าใครเนิร์ดสตาร์วอส์น่าจะชอบทีเดียวเชียว แค่ดูรูปและความพยายามในการตั้งชื่อแต่ละเมนูก็สนุกแล้ว
วันนี้เจ้าของบล็อกลองทำเมนูบนหน้าปกเลยค่ะ Wookiee Cookies นั่นเอง
หรือถ้าจะเรียกให้ง่าย ก็คือ Double chocolate chips cookies ค่ะ
เพราะใช้ช็อคโกแลตชิพถึง 2 อย่าง คือทั้ง semi-sweet chocolate chips และ milk chocolate chips

มาเตรียมของกัน
  • แป้งอเนกประสงค์ 2 1/4 ถ้วย
  • เบคกิ้งโซดา 1 ช้อนชา
  • เกลือ 1 ช้อนชา
  • อบเชยป่น 1 ช้อนชา
  • เนยจืด 1 ถ้วย (ก็ 1 ก้อน 227 กรัมนั่นแล) ตั้งทิ้งไว้ที่อุณหภูมิห้อง
  • น้ำตาลทรายแดง 1 ถ้วย
  • น้ำตาลทรายป่น 1/2 ถ้วย
  • ไข่ใบใหญ่ 2 ฟอง
  • วานิลลา 1 1/2 ช้อนชา
  • มิลค์ ช็อคโกแลตชิพ 1 ถ้วย
  • เซมิ-สวีต ช็อคโกแลตชิพ 1 ถ้วย
 Let's prepare things
  • 2 1/4 cups all-purpose flour
  • 1 teaspoon baking soda
  • 1 teaspoon salt
  • 1 teaspoon ground cinnamon
  • 1 cup unsalted butter, at room temperature
  • 1 cup packed brown sugar
  • 1/2 cup granulated sugar
  • 2 large eggs
  • 1 1/2 teaspoons vanilla extract
  • 1 cup milk chocolate chips
  • 1 cup semi-sweet chocolate chips
เริ่มปฏิบัติการค่ะ
  • อุ่นเตาอบไว้ที่อุณหภูมิ 375 องศาฟาเรนไฮต์ (ประมาณ 190 องศาเซลเซียสค่ะ)
  • ผสมแป้ง เบคกิ้งโซดา เกลือ อบเชยป่น ในชาม คนให้เข้ากัน พักไว้
  • อีกถ้วยนึง เราตีเนยกับน้ำตาลทั้ง 2 ชนิดด้วยความเร็วสูง จนเข้ากัน และสีอ่อนลง ประมาณ 3 นาที หลังจากนั้นใส่ไข่ วานิลลา ผสมให้เข้ากัน จากนั้นตามด้วยแป้งค่ะ เปลี่ยนมาใช้ไม้พายผสมนะคะ เข้ากันปั๊บ ใส่ช็อคโกแลตชิพทั้ง 2 ชนิดลงไปเลยค่ะ
  • ตักส่วนผสมประมาณ 1 ช้อนโต๊ะพูนๆ วางลงบนแผ่นรองอบ เว้นระยะสำหรัีบแต่ละชิ้นไว้อย่างน้อย 1 นิ้วนะคะ เพราะระหว่างที่อบ มันจะบานออกอีกค่ะ
  • อบจนเป็นสีเหลืองทองหอมฟุ้ง ใช้เวลาประมาณ 10 นาที
  • เมื่อคุ้กกี้สุก ใช้สปาตูลาเซาะคุกกี้มาผึ้งไว้บนตะแกรงจนเย็นสนิท
Directions
  • Preheat the oven to 375 F
  • Put the flour, baking soda, salt, and cinnamon in a mixing bowl. Stir with the wooden spoon until well mixed. Set aside.
  • Put the butter, brown sugar, and granulated sugar in another mixing bowl. Using the electric mixer set on high speed, beat together until well blended and creamy, about 3 minutes. (You can do this with a wooden spoon, but it will take longer.) Beat in the eggs and vanilla extract. Add the flour mixture and stir with the wooden spoon until blended. Stir in the chocolate chips.
  • Scoop up a rounded tablespoonful of the dough and drop onto a baking sheet. Repeat until you have used up all the dough. Be sure to leave about 1 inch between the cookies because they spread as they bake.
  • Using pot holders, put the baking sheets in the oven. Bake until golden brown, about t 10 minutes.
  • Again, using pot holders, remove the baking sheet from the oven. Lift the cookies from the baking sheet with a spatula, and place on cooling racks. Let cool completely.


สูตรนี้เจ้าของบล็อกผลิตคุกกี้ออกมาได้ 3 โหล พอดีเด๊ะๆเลยค่ะ

โดยปกติแล้วเจ้าของบล็อกจะลดน้ำตาลจากสูตรพอสมควร แต่วันนี้อยากลองทำตามสูตรดูบ้าง
ซึ่งก็ตามคาดค่ะ ว่าหวานเจี๊ยบ แต่คนที่คิดว่าโอเคแล้วก็มีนะคะ
(แต่ต้องบอกไว้ก่อนนะคะ ว่าเจ้าของบล็อกเป็นคนทานหวานน้อยยยยมาก)

เอาเป็นว่าทานพร้อมชาร้อนๆ หรือนม ก็ช่วยได้เยอะเลยค่ะ :)

I've got 3 dozen from this recipe.

Normally, I will deduct sugar from the recipe but this time I want to follow it.
And as I though, this is too sweet for me. (but please note that I'm not a sweet tooth.)

If you prefer less sweet, I suggest to have this cookies with milk or hot tea.
That helps a lot. :)

Sunday, August 12, 2012

・Callum's Croissant Pudding with Clotted Cream and Berries ・

เจ้าของบล็อกไปเห็นสูตรนี้เข้าจากใน pantip ค่ะ
เห็นคุณว่านน้ำเขาทำ ก็เลยลองทำดูบ้าง แถมยังได้ดู Junior Master Chef ทำเอาหลงเสน่ห์เด็กน้อยทั้งหลาย เด็กๆทุกคนทำอาหารกันเก่งสุดๆ แถมแต่ละคนก็ดูจิตดีมาก แม้ว่าจะต้องแข่งขันกัน แต่ก็ให้กำลังใจกันตลอดเวลา ไม่มีดราม่าให้เหนื่อยหัวใจ

I've found this recipe from pantip.com
One of board member have made it and also introduced me "Junior Master Chef".
After I watch this cooking reality, I'm totally fall in love with the kids. They all are fantastic, their cooking skill are superb and they also have a good heart, always cheer up other contestants even they are in the competition. That's  so cute.

ใครอยากลองทำตาม ดูได้จากลิงค์นี้นะคะ
แต่รู้สึกว่าคุณว่านน้ำเขาจะมีปรับสูตรนิดหน่อย

If you can read Thai, you can get the recipe from the link below, but she was adapted in some part of the recipe.
http://webcache.googleusercontent.com/search?q=cache:6NN14LHL6WQJ:www.pantip.com/cafe/food/topic/D12352658/D12352658.html+&cd=7&hl=th&ct=clnk&gl=th 

สำหรับสูตรออริจินอล ตามมาที่นี่เลยค่า เจ้าของบล็อกทำตามสูตรออริจินอลนี้แล เพียงแต่ว่า เค้าไม่มี chocolate croissant ก็เลยใช้ croissant ธรรมดาแทนนะจุ๊ ผลลัพธ์ที่ได้ก็ไม่มีผิดหวังค่ะ เนื้อ pudding นุ่มมมม croissant ก็กรอบ ทานพร้อมครีม ซอสช็อคโกแลต และสตรอว์เบอร์รี่ รสชาติลงตัวมากค่ะ

The original one that I did is below link, but I substitute chocolate croissant to butter croissant. The result is great pudding texture is so soft contrast with croissant that is crunchy outside. Combining with clotted cream, chocolate sauce and marinated strawberry made this dish remarkable. 

https://docs.google.com/viewer?a=v&q=cache:AeMyBS1ivLwJ:www.masterchef.com.au/recipesapi//docs/pdf.aspx?rid%3D139%26sid%3D1%26template%3Drecipe-main+&hl=th&gl=th&pid=bl&srcid=ADGEEShzQd59Fao06jE29_7BXpIumWRf6F8Af0Lm2krHtWcCXbkxT-g4RRingt-R3Qy0QS9Xlhbq2pAhrbrP7iNcPuRjk44cd5YvYeh3KUGxp47x8Zcj3250ZoXdkqW5GyyYkbe1riWN&sig=AHIEtbQqoTM1qVgC60VYdXcggcY8AwYFRQ&pli=1


ทานกับแยมเสาวรสก็เข้ากันดีนะคะ
Variation: with passion fruit preserved

ทาน Croissant pudding จนหมด ยังมีซอสช็อคโกแลตอยู่พอสมควร เลยเอามาทานกับนู่นนี่เรื่อยเปื่อยค่ะ
ซอสช็อคโกแลตนี่ พอแช่เย็นแล้วเนื้อจะแน่นหน่อย เหมือนมูสเลยค่ะ แต่พอออกจากตู้เย็นซักพักก็จะเหลวนะคะ ทานตอนเย็นๆ อร่อยกว่าค่ะ

After I finished my croissant pudding I still have some amount of chocolate sauce so I adapted to have my chocolate sauce in variations below.
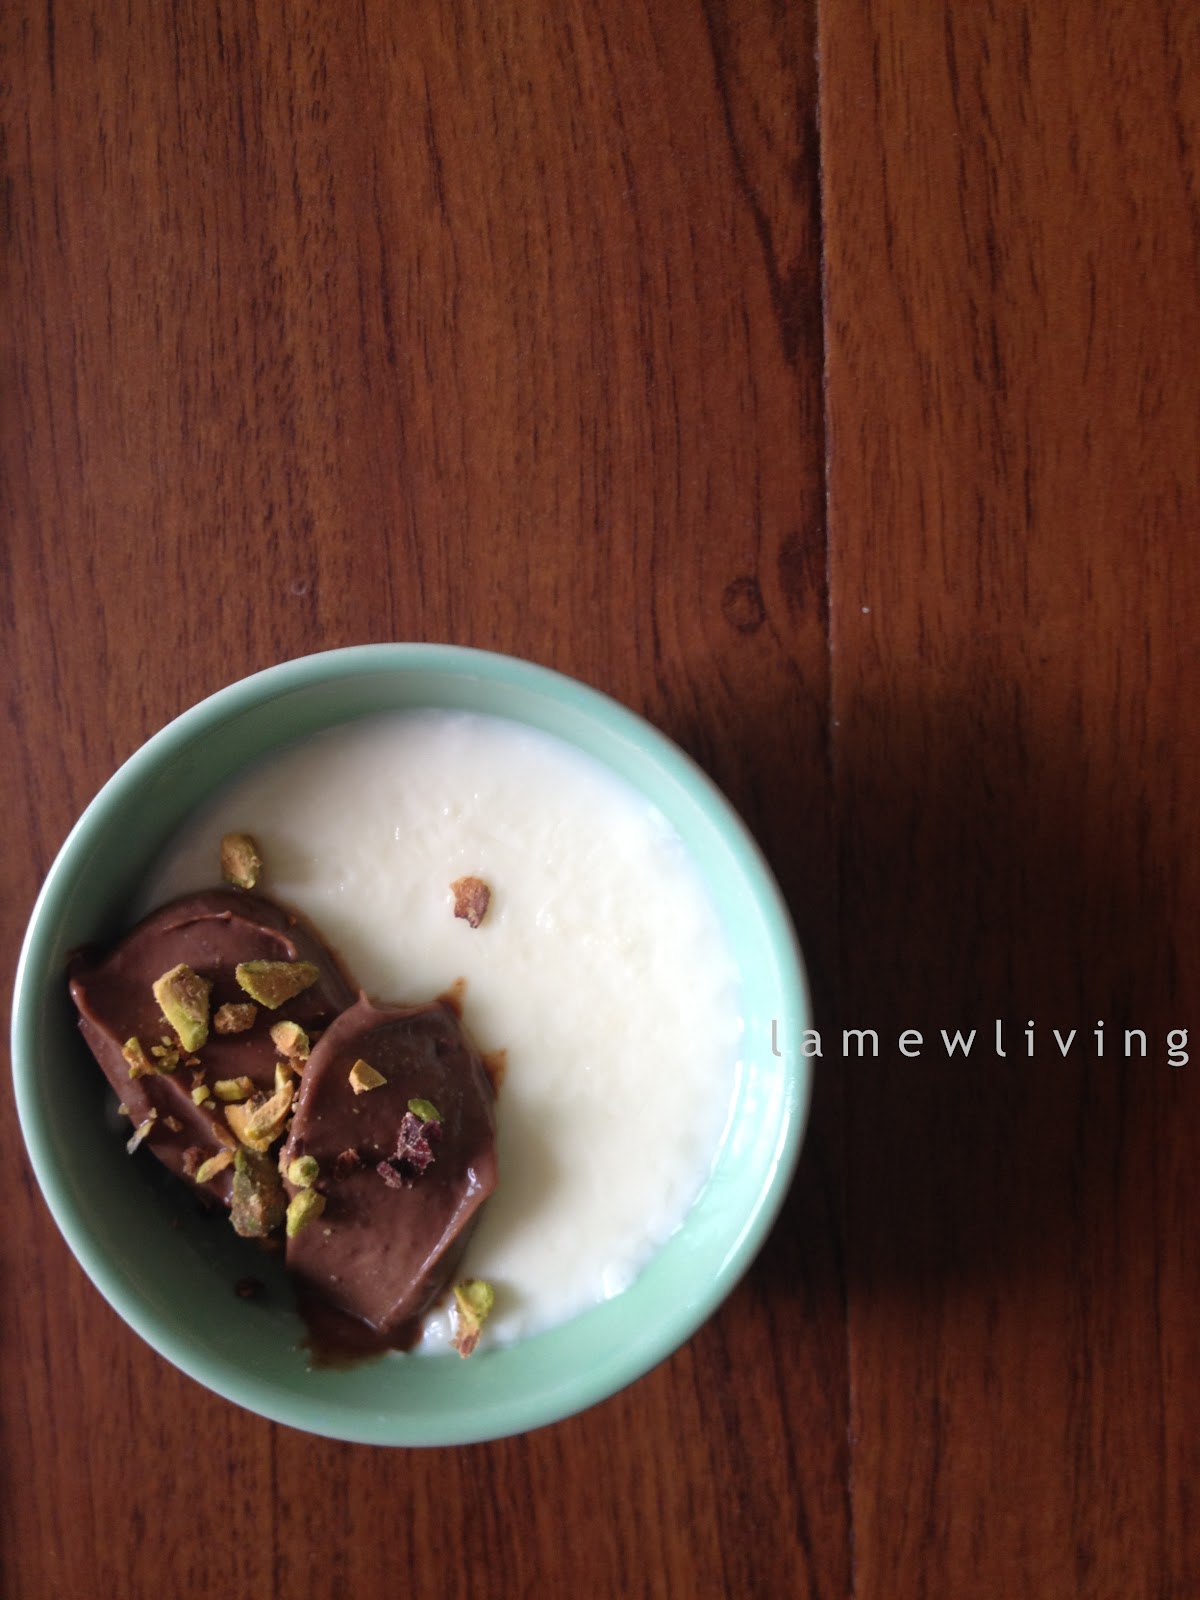
This chocolate sauce is quite like a mousse once chilled but rather runny when time passed so you  should have it once still cold.

 ทานกับสตรอว์เบอร์รี่
With strawberry.

กับมันฝรั่งทอด
With chips

กับนมตุ๋น สูตรตามนี้เลย http://topicstock.pantip.com/food/topicstock/2009/06/D7947636/D7947636.html
With steamed milk

กับแครกเกอร์
With cracker

ส่วนใครอยากดูความน่ารักของน้องๆ และฝีมือทำอาหารเทพๆ ตามไปที่นี่เลยจ้ะ

For those who want the see kids' loveliness and their amazing skill, follow the link below.

http://www.dailymotion.com/video/xesgkq_junior-masterchef-aus-episode-1-par_shortfilms

Friday, May 20, 2011

・Banana cake with chocolate frosting ・

Nearby my house, there is a cooker's utensils store called "Verasu".
I like this place, moreover utensils they have demonstration cooking class every Saturday.
After watching the cooking demonstration, we will find many of fresh bake donuts/waffles to serve us. ('Coz they want to sell their waffle/donut makers Haha..)
And they also have cafe that all the dessert made from spelt flour to prevent gluten.
And they are delicious. Ummm... :)

Sometimes I don't participate in the demonstration class but I only just buy the recipe from the counter (only 10 Baht each).
But I suggest that being participated will profit you more because demonstrator usually tells techniques / minor details those are not publish in the recipe sheet.

Recipe I use today is also from Verasu class.
I did this because one of my colleague requested for dessert that has banana and chocolate in it.

The cake is softer than normal butter cake and it go along well with chocolate frosting.
(My mistake is I used salted butter and it makes frosting taste salty, some like it, but I would not suggest that anyway.)


เจ้าของบล๊อกชอบไปเที่ยวเล่นที่วีรสุค่ะ
ที่ชอบก็เพราะว่าดูเป็นร้านค้าเฉพาะทาง สำหรับคนที่ชอบทำอาหาร อยากได้อุปกรณ์อะไรก็มีหมด
ทุกวันเสาร์มีการสอนทำอาหาร/ขนมจากอุปกรณ์เครื่องใช้ไฟฟ้าต่างๆของร้าน
ดูสาธิตจบ ลงมาเดินเล่น ก็มีขนมที่ออกจากเตาใหม่ๆ ทั้งวาฟเฟิล โดนัท ให้กินกันเพลินๆ
แล้วถึงจะไม่ว่างดูการสาธิต เราก็พุ่งเข้าไปขอซื้อสูตรจากพนักงานที่เคาน์เตอร์ได้เลยค่ะ สูตรละ 10 บาทเท่านั้น (แต่แนะนำว่าถ้าไปดูสาธิตเองจะดีกว่าค่ะ เพราะบางทีพี่ๆเค้าก็มีเทคนิคมาบอกกัน)

สูตรเค้าแต่ละสูตรก็ใช้ได้เลยค่ะ ลองชิมมาหลายแล้ว แต่ข้อเสีย (หรือเปล่า) ก็คือสูตรเค้าค่อนข้างใหญ่
บวกกับเจ้าของบล๊อกชอบทำชิ้นเล็กๆน่ะค่ะ เลยได้จำนวนมหาศาลเชียว พอทำเสร็จก็ต้องมานั่งคิดว่าจะแบ่งใครบ้างดีน้า
(ส่วนใหญ่พี่ๆที่ออฟฟิศเนี่ยแหละค่ะ ที่จะกลายเป็นเหยื่อ ;b)

สูตรวันนี้ก็มาจากวีรสุค่ะ
เลือกมาทำก็เพราะว่าพี่ที่ออฟฟิศรีเควสท์เค้กอะไรก็ได้ที่มีกล้วย และช็อกโกแลตเป็นส่วนประกอบหลัก
เนื้อเค้กเบาเกินกว่าที่จะเชื่อว่าเป็นเค้กเนยค่ะ Frosting ก็เข้ากั๊น เข้ากันกับเค้ก
(ครั้งนี้เจ้าของบล๊อกดันขี้เกียจออกไปซื้อเนยจืด เลยใช้เนยเค็มที่มีอยู่ในบ้านไปก่อน เลยกลายเป็น Frosting รสออกเค็มซะงั้น แต่พี่คนนึงบอกว่าดี ไม่เลี่ยน อืม.. ก็นานาจิตตังเนอะ กลายเป็นดีไป แต่เจ้าของบล๊อกก็แนะนำว่าอย่าใช้เนยเค็มเลยเน่อ)

ถ้าเตรียมอุปกรณ์พร้อมแล้วก็มาเริ่มกันเลยเจ้า


・Banana cake with chocolate frosting ・
Makes 1 28-c.m. round cake pan / 20 mini cakes


Ingredients: Banana cake

Cake flour 240 grams
Baking powder 1 3/4 teaspoon
Baking soda 1 1/4 teaspoon
Salt 3/4 teaspoon
Castor unrefined suger 180 grams
Unsalted butter 140 grams
Mashed ripe banana 200 grams (about 2-3 bananas)
Egg 3
Yogurt (natural flavor) 1/2 cup
Vanilla 1 1/4 teaspoon


ส่วนผสม: เค้กกล้วยหอม

แป้งเค้ก 240 กรัม
ผงฟู 1 3/4 ช้อนชา
ผงโซดา 1 1/4 ช้อนชา
เกลือป่น 3/4 ช้อนชา
น้ำตาลทรายสีรำป่น 180 กรัม
เนยสด (จืด) 140 กรัม
กล้วยหอมสุกบด 200 กรัม (ประมาณ 2-3 ลูก)
ไข่ไก่ (เบอร์ 2) 3 ฟอง
โยเกิร์ตรสธรรมชาติ 1/2 ถ้วยตวง
วานิลลา 1 1/4 ช้อนชา


Directions: Banana cake

1. Sifting the flour before doing measurement, combine flour with baking powder, baking soda and salt. Set aside.
2. Beating butter until fluffy, gradually add sugar and banana, mix well.
3. Add egg, one at a time.
4. Add flour --> yogurt --> flour, mix to just combined.
5. Pour the batter in prepared cake pan (28 cm. diameter).
6. Baking at 150°C about 15 minutes then decrease heat to 140°C about 25-30 minutes until done. Leave on wire rack.

วิธีทำ: เค้กกล้วยหอม

1. ร่อนแป้งก่อนตวง 1 ครั้ง แล้วร่อนรวมกับผงฟู ผงโซดา เกลือป่นเข้าด้วยกัน พักไว้
2. ตีเนยให้ขึ้นฟูเป็นครีมด้วยเครื่องตีไข่ ระดับความเร็วปานกลาง ค่อยๆใส่น้ำตาลทรายจนหมด ใส่กล้วยหอม ตีต่อจนส่วนผสมเข้ากันดี
3. ใส่ไข่ไก่ลงทีละฟอง ตีให้เข้ากันทุกครั้ง ก่อนใส่ไข่ฟองต่อไป
4. ใส่แป้งสลับกับโยเกิร์ตที่ผสมวานิลลา โดยแบ่งแป้งเป็น 2 ส่วน โยเกิร์ต 1 ส่วน วิธีผสมใช้ความเร็วต่ำสุด ตะล่อมพอเข้ากัน
5. เทส่วนผสมที่ได้ลงในพิมพ์กลมขนาดเส้นผ่านศูนย์กลาง 28 ซ.ม. ที่รองด้วยกระดาษไขและทาเนยขาวเตรียมไว้
6. นำเข้าอบที่อุณหภูมิ 150°C เวลา 15 นาที แล้วลดไฟเหลือ 140°C อบต่ออีกประมาณ 25-30 นาที หรือจนกระทั่งสุกเหลือง นำเค้กออกจากพิมพ์ พักไว้ให้เย็น


Ingredients: Chocolate Frosting

Dark chocolate 100 grams
Icing sugar 200 grams
Whipping cream 1/4 cup
Salt 1/4 teaspoon
Unsalted butter 227 grams
Vanilla 1 teaspoon


ส่วนผสม: ครีมช็อกโกแลต

Dark chocolate 100 กรัม
น้ำตาลไอซิ่ง 200 กรัม
วิปปิ้งครีม/นมข้นจืด 1/4 ถ้วย
เกลือป่น 1/4 ช้อนชา
เนยสด (จืด) 227 กรัม
วานิลลา 1 ช้อนชา


Directions: Chocolate frosting

1. In the heatproof bowl, mixing dark chocolate, icing sugar, whipping cream and salt, put in microwave using high heat (800-900 watt) about 1 1/2 minute. Whisk until smooth, add vanilla. Leave to cool.
2.Beating butter until fluffy, gradually add chocolate mixture in the butter, mix well.

วิธีทำ: ครีมช็อกโกแลต


1. นำ Dark chocolate น้ำตาลไอซิ่ง วิปปิ้งครีม เกลือป่น ใส่ในถ้วยตวงของเหลวขนาด 2 ลิตร นำเข้าเตาไมโครเวฟ ใช้ไฟ High (800-900 วัตต์) เวลา 1 1/2 นาที ใช้ตะกร้อค่อยๆคนให้ส่วนผสมเนียน ใส่วานิลลา พักทิ้งไว้ให้เย็น
2. ตีเนยสดให้ขึ้นฟูเป็นครีมด้วยเครื่องตีไข่ ระดับความเร็วปานกลาง ค่อยๆเทส่วนผสมข้อ 1 ลงตีต่อจนส่วนผสมเข้ากันดี


Decoration
If you do round cake, slice cake to 2 parts, add thin layer of frosting. Place the other half above and cover with chocolate frosting. Decorating with white/dark chocolate/banana/cherries as you like.
(I did use chocolate and sun-dried banana to decorate.)

ประกอบร่าง

ใช้ที่แบ่งเค้กแบ่งออกเป็น 2 ส่วน ปาดครีมช็อกโกแลตบางๆให้ทั่วชิ้นเค้ก นำเค้กอีกชิ้นวางซ้อนทับ ปาดครีมช็อกโกแลตให้ทั่วทั้งชิ้นเค้ก แต่งหน้าด้วยช็อกโกแลตขาวและดำ โดยบีบเป็นเส้นสลับกันให้สวยงาม ตกแต่งด้วยกล้วยหอมหั่น และเชอร์รี่แดงให้สวยงาม
(สำหรับชิ้นที่ถ่ายรูปมาอวด เจ้าของบล๊อกทำเป็นคัพเค้ก บีบหน้าด้วย choc
olate frosting แล้วแต่งหน้าด้วยกล้วยตากค่ะ)


Enjoy :)

Saturday, May 7, 2011

・Orange and chocolate cheesecake ・

I've made this cheesecake to serve my friend's request.


She asked for it many times but when I made it there's something to interupt our meetings.

So I think if I made it this time and we can't meet up again, I won't do this cheescake again in my life. (Actually it's because this cheesecake is quite complicated in making

and normally i don't like orange so if I have to take it back home I have to find other victims to have it. Haha..)


But finally we meet up this time. :D

She loved it.

I used recipe from the book below.


Because we have to seperate egg yolk and egg white and fold them together at last.

It makes this cheesecake has more light texture.

And by using lots of orange plus orange juice gives us mild tangy taste and fresh feeling.


เค้กนี้เจ้าของบล็อกจัดตามรีเควสท์ของเพื่อนคนนึงค่ะ

เค้าอยากกินมานานแล้ว แต่ว่าพอทำมาทีไร ก็มีเหตุให้ต้องแคล้วคลาดกันทุกที
จนคิดว่าเป็นเค้กอาถรรพ์ไปซะแล้ว

เจ้าของบล็อกยังคิดว่า ถ้าฉันทำรอบนี้แล้วยังไม่ได้เจอกันอีกนะ ชีวิตนี้จะไม่ทำอีกเล้ยยย

แต่ก็ได้เจอกันจนได้ค่ะ


เพื่อนๆชม เจ้าของบล็อกก็ตัวลอย

สูตรชีสเค้กครั้งนี้มาจากหนังสือชีสเค้กแสนอร่อย จากสำนักพิมพ์แสงแดดค่ะ


ชีสเค้กนี้ถือว่าเป็นชีสเค้กที่ค่อนข้างวุ่นวายค่ะ เพราะต้องแยกตีไข่ขาวกับไข่แดง แล้วค่อยมา fold รวมกัน

เนื้อชีสเค้กก็เลยค่อนข้างเบา

แปลกอีกอย่างคือฐานเป็นเวเฟอร์รสช็อกโกแลต ไม่ใช่บิสกิตหรือแครกเกอร์เหมือนที่เคยทำ

ตอนแรกยังนึกว่ามันน่าจะแฉะๆ แต่ก็ไม่แฮะ

แถมใส่ส้มเป็นชิ้นๆจริงจัง ทานแล้วสดชื่นนนนดีค่ะ


Orange and chocolate cheesecake


Makes: 9 cups (4 Ounces)

or 11x15 inches square pan


Ingredients


Cheesecake crust


  • Chocolate wafer 135 grams


  • Melted butter 1/4 cup


Cheesecake


  • Gelatin powder 2 tablespoons in warm water 3 tablespoons


  • 3 Egg yolk


  • Sugar 2 tablespoons


  • Creamcheese 250 grams


  • Sourcream 145 grams


  • Grand manier 2 tablespoons


  • 3 Valencia oranges


  • Sugar 2 1/2 tablespoons


  • Water 3 tablespoons


  • 2 Egg white

Decoration


  • Orange, orange zest and chocolate


ส่วนผสม


ฐานชีสเค้ก


  • เวเฟอร์ช็อกโกแลต 135 กรัม


  • เนยสดชนิดจืดละลาย 1/4 ถ้วย


ชีสเค้ก


  • เจลาตินผง 2 ช้อนโต๊ะ ละลายในน้ำอุ่น 3 ช้อนโต๊ะ


  • ไข่แดงของไข่ไก่ (ฟองละ 65 กรัม) 3 ฟอง


  • น้ำตาลทราย 2 ช้อนโต๊ะ


  • ครีมชีส 250 กรัม


  • ซาวร์ครีม 145 กรัม (1 ถ้วยบรรจุ)


  • เหล้ากรองมาร์เนีย 2 ช้อนโต๊ะ


  • เนื้อส้มวาเลนเซียหั่นสี่เหลี่ยมเล็ก 1/2 ถ้วย (ประมาณ 3 ผล)


  • น้ำตาลทราย 2 1/2 ช้อนโต๊ะ


  • น้ำ 3 ช้อนโต๊ะ


  • ไข่ขาวของไข่ไก่ (ฟองละ 65 กรัม) 2 ฟอง

ตกแต่ง

กลีบส้ม ผิวส้ม และดาร์กช็อคโกแลต


Directions


  1. Making cheesecake crust by beating chocolate wafer and combine with melted butter. Put it in cheesecake pan. Refrigerated.


  2. Melted gelatin powder in warm water, stir, let it cool. Fill 1/4 of pot by water, bring to boil, reduce the heat. Put egg yolk and sugar in the heat proof bowl using whisk to beat the egg yolk on the boiling water until pale in color and thicker. Leave it to cool.


  3. Beat creamcheese until smooth add egg yolk mixture, mix well, add sourcream, grand manier and gelatin, mix until smooth, add orange and orange juice, stir and set aside.


  4. Making meringue by put sugar and water in the pot on low heat until the syrup have big bubble, beating egg white until get fluffly. When syrup has smaller bubble, gradually pour in egg white beat until it gets warmer.


  5. Fold egg white mixture into creamcheese part, 1/3 at a time. Pour on cheesecake crust, refrigerate about 2 hours until firm. Decorate with orange, orange zest and chocolate.


วิธีทำ


  1. ทำฐานชีสเค้กโดยบดเวเฟอร์ให้ละเอียดด้วยที่ทุบเนื้อ ใสเนยละลาย เคล้าให้เข้ากัน แบ่งใส่ถาดพาย ใช้ไม้คลึงแป้งหรือช้อนขนาดเล็กกดเวเฟอร์ให้แน่น นำเข้าแช่ในตู้เย็นช่องธรรมดา


  2. ทำชีสเค้กโดยละลายเจลาตินผงด้วยน้ำอุ่น คนให้เข้ากัน พักไว้ให้หายร้อน ระหว่างนี้ใส่น้ำลงในหม้อประมาณ 1/4 ของหม้อ ยกขึ้นตั้งบนไฟกลางจนเดือด ลดเป็นไฟอ่อน ใส่ไข่แดงและน้ำตาลลงในอ่างสเตนเลสหรือชามทนความร้อน ยกขึ้นวางบนหม้อน้ำเดือดอ่อนๆ ใช้ตะกร้อตีจนไข่แดงข้น และสีอ่อนลง ยกลงจากหม้อ ตีต่อจนไข่แดงหายร้อน พักไว้ตีครีมชีสในอ่างผสมอีกใบด้วยเครื่องตีไข่ไฟฟ้าด้วยความเร็วต่ำสุดจนครีมชีสนุ่มเนียน ใส่ไข่แดงที่หายร้อนแล้วลงไป ตีจนเนียนเป็นเนื้อเดียวกัน ใส่ซาวร์ครีม ตีต่อจนเข้ากัน ใส่เหล้า เจลาตินที่ละลายไว้ ตีจนเข้ากัน ใส่เนื้อส้มและน้ำส้มที่ได้ตอนหั่นส้ม คนด้วยพายยางให้เข้ากัน พักไว้


  3. ทำเมอแรงก์ไข่ขาวโดยใส่นำตาลกับน้ำลงในหม้อ ยกขึ้นตั้งบนไฟอ่อน จนน้ำเชื่อมเริ่มเดือดเป็นฟองใหญ่ๆ จึงตีไข่ขาวในอ่างผสมด้วยเครื่องตีไข่ไฟฟ้า ตีด้วยความเร็วปานกลางจนไข่ขาวขึ้นฟู และเมื่อฟองน้ำเชื่อมมีขนาดเล็กลง ปิดไฟยกลง ค่อยๆเทน้ำเชื่อมร้อนลงในไข่ขาวเบาๆตีต่อจนไข่ขาวหายร้อน ตั้งยอดแข็งและมันวาว


  4. แบ่งไข่ขาวใส่ลงในชีสเค้กข้อ 3 ทีละ 1/3 ส่วน ใช้พายยางตะล่อมเบาๆให้เข้ากัน ตักชีสเค้กลงในถาดพายที่เตรียมไว้จนเต็ม นำเข้าแช่ในตู้เย็นช่องธรรมดาประมาณ 2 ชั่วโมง จนชีสเค้กอยู่ตัว ตกแต่งหน้าชีสเค้กด้วยกลีบส้ม ผิวส้ม และดาร์กช็อกโกแลต


Enjoy :)

Monday, March 7, 2011

・ Banana chocolate mousse ・

Last Friday I went to Nagiya restaurant at Nihonmachi in soi Sukhumvit 26.

(This is also my favorite restaurant :3) This restaurant is a izakaya style restaurant.
When I came here, I feel like I'm in Japan. :)
They serve japaneese dishes and liquor. All dish taste authentic (maybe it's because of the atmosphere.)
My favorite dish is kimchi nabe and all yakitori dishes. (That's mean all :b)
Though I love the food and atmosphere but what I find it quite annoy is the chorus of waiters, waitresses that keep yelling in my ears.
I understand the tradition but this is too much. I can't keep concentrate on our table's topic and sometimes it makes me startle.
You can read (other's) review here.


After we finished the meal, I ordered chocolate mousse (that is also gooood :9) but unfortunately that they don't have any left. :(


So here comes my version of chocolate mousse and because I still have bananas left from making banoffee pie so I add it up together.


Actually I got this recipe from someone's blog, but really sorry that I don't remember where. Thank you for your recipe. It's really good. :)


・Banana chocolate mousse ・


Makes about 8 serving cups


Ingredients

Milk chocolate 100 g

Dark chocolate 150 g

3 egg white

1/2 cup syrup

250 g whipping cream

bananas


Direction

1. Melting chocolate on double boiler once melted, set aside.

2. Beat egg white until having soft peak add warm syrup. Beat until you got stiff peak. Fold in chocolate ingredient.

3. Whip whipping cream until stiff peak form, fold into no.2 ingredient.

4. Scoop on serving dish, add banana and chill over the night.


Enjoy :)


By the way, did anyone watch "Black Swan" yet?


I love it.

This movie makes my eyes stick on screen all the way.

Natalie's acting is super good. I think she deserves Oscar.

What do you think?

Saturday, November 27, 2010

The Daring Cooks November, 2010 Challenge: RISE AND SHINE!

Dave and Linda from Monkeyshines in the Kitchen chose Soufflés as our November 2010 Daring Cooks’ Challenge! Dave and Linda provided two of their own delicious recipes plus a sinfully decadent chocolate soufflé recipe adapted from Gordon Ramsay’s recipe found at the BBC Good Food website.

I chose chocolate souffle for this month's challenge.
It is quite exciting to watch souffle risen in the oven.
It dramatically rose in my oven and also fall in light speed. Haha..
So I agree with Dave and Linda that the hardest part of this challenge is taking photo, you should prepare the set before hand and get ready to take photo as soon as souffle is out of the oven.

As you can see from my picture that some of my souffles are already fall. :b


Ingredients

FOR THE DISHES

2 Tbsp (30 ml) 1 oz (30g) unsalted butter, for greasing
Cocoa powder or finely grated chocolate

FOR THE CREME PATISSERIE

2 tbsp (30 ml) (18 gm) (2/3 oz) plain (all-purpose) flour
2 tsp (10 gm) (0.35 oz) caster (superfine) sugar (regular sugar is OK)
½ tsp (4½ gm) (0.15 oz) corn starch (aka cornflour)
1 medium egg yolk
1 medium whole egg
4 Tbsp (60 ml) milk

5 Tbsp (75 ml) heavy cream (or double cream)
3 oz (90gm) good-quality dark chocolate preferably 70+% cocoa solids, broken in pieces
2 Tbsp (30 ml) (15 gm) (½ oz) unsweetened cocoa powder
Optional:
2 tsp orange zest or 2 tsp minced chipotle chile en adobo or 1 tsp chipotle chile powder. (I used chile version but mine is Hungary paprika)

Optional: powdered sugar for dusting


FOR THE EGG WHITES

6 medium egg whites

6½ Tbsp (95 ml) 3 oz (90g) superfine/caster sugar (if you don’t have it, regular sugar is OK)


Directions:

1. Heat oven to moderate 375 ˚F/190 ˚C/gas mark 5.
2. Take four 1 cup/~240ml soufflé dishes and brush them completely with softened butter. Tip a little cocoa powder or grated chocolate into each dish, roll the dish around tilting it as you do so it is evenly lined all round.

3. For the crème patisserie, mix the flour, sugar and corn starch into a small bowl. Put egg yolk and whole egg into a medium sized bowl, beat lightly, then beat in half of the flour mixture to give a smooth paste. Tip in the rest of the flour mixture and cocoa powder and mix well.
4. To make the ganache, pour the milk and cream into a pan and bring just to the boil. Remove from the heat. Add the chocolate and beat until it is melted and smooth with no lumps.
5. Gradually stir hot chocolate ganache into the paste from step 3, and add the orange zest or chile if using. This is your crème patisserie.
6. Whisk the egg whites to soft peaks with an electric whisk. Sprinkle in the sugar as you are mixing. Keep whisking to give stiff, firm peaks to give volume to the soufflés.
7. Stir about 2 tbsp (30 ml) of the beaten egg whites into the crème patisserie. Carefully fold in a third of the rest, cutting through the mixture. Fold in another third (take care not to lose the volume), then fold in the rest.
8. Spoon the mixture into the dishes. Run a spoon across the top of each dish so the mixture is completely flat. Take a little time to wipe any splashes off the outside of each dish, or they will burn on while cooking.
9. Bake the soufflés for 15-17 minutes.
10. The soufflés should have risen by about two thirds of their original height and jiggle when moved, but be set on top.


Taste is good, not so sweet, and a bit of paprika aroma makes it more special.

Anyways, thank you Dave and Linda for this amuse challenge and couldn't agree more with the words of James Beard: "The only thing that will make a soufflé fall is if it knows you are afraid of it". :)

Sunday, September 12, 2010

・Suzy's cake ・

Last Thursday I just made one dessert that came from the book that I ordered via Amazon.
(Thank you Noto for your kind shipping the book to me. :D)
I got this recipe from Chocolate desserts by Pierre Herme.


I have to admit that this cake have the most rich, melt-in-the-mouth texture and so chocolaty I ever had.
While the direction is so simple and the ingredients is not much and not hard to find.
I couldn't agree more about using the best chocolate you can find, and you will get the spectacular result.

In the recipe, He suggested Valrhona chocolate is the best choice but since I can't find it here so other will do. But make sure that you choosing the best, I insist.
And I'm quite sure that I will have a second try on this recipe soon with a twist by adding raspberries along with the batter. (As suggested in the book)


・Suzy's cake ・
Makes 8-10 servings


Ingredients
・250 grams bittersweet chocolate (70.5% cacoa)

・250 grams unsalted butter, at room temperature
2oo grams sugar
・4 large eggs, at room temperature (60 grams each)
・70 grams all-purpose flour

plus extra butter and flour for cake pan

Direction
・Center a rack in the oven and preheat the oven to 350 degree Fahrenheit (180 degree Celsius) Butter a 9-inch (24-cm) round cake pan that is at lease 2 inches (5 cm) high, line the bottom with parchment paper, butter the paper, and dust the inside of the pan with flour; tap excess and set the pan aside.

・Place a chocolate in a heatproof bowl over - not touching - simmering water and beat until the chocolate is melted; or melt chocolate in a microwave oven. Set chocolate aside to cool; it should feel only just warm to the touch when you mix it with the rest of the ingredients.

・Put the butter and sugar on the bowl of a mixer fitted with the paddle attachment and beat on medium speed for about 4 minutes, scraping down the side of the bowl frequently, until the butter is creamy and the sugar will blended into it. Add the eggs one at a time, beating for about one minute after each addition. Reduce the mixer speed to low, pour in the cooled chocolate, and mix just until it is incorporated. With the mixer still on low, add the flour and mix only until it disappears into the batter. Alternatively, you can fold in the last of the flour with a rubber spatula. You will have a thick, smooth, satiny batter that looks like old-fashioned chocolate frosting.

・Scrap the batter into the pan, smooth the top, and slide the pan into the oven. Bake for 26-29 minutes. (I use only 15), or until the cake rises slightly and the top has lost it sheen. The top may crack a bit and the cake may not look entirely set in the center, when you test the cake by inserting a slender knife into the center, the knife will come out slightly streak with batter, which is what you want. Transfer the cake to a rack to cool.

・When the cake has cooled, chill it in the refrigerator for an hour or two to make it easy to unmold. Turn the cake out, remove the parchment, and invert the cake onto a serving platter so this is right side up. Allow the cake to come to room temperature before slicing and serving.

・Better serve with ginger ice cream, lightly sweetened whipped cream or vanilla creme anglaise.

Enjoy :)

Thursday, July 1, 2010

・Petite chocolate muffin with macademia and chocolate chips ・

According to my previous blog, I got the new mission to find new recipe for my friends party.
Therefore, after browsing million webs, here come the recipe that I have made.

"Petite chocolate muffin with macademia and chocolate chips"


Impressive, huh...? If you wanna try the recipe please follow the link here (Thai) or here (English).
(I'm a hugh fan of this blog. Her sweets look nice and makes me wanna try every of them.)

I do
adjusted a little by changing white chocolate chips into macademia, and the taste still good.
Actually, I kind of not like to bake chocolate cake because cacao powder in chocolate cake recipe usually make the cake have dry texture.

After I've try this, I have to admit that I think the cake have a bit dry texture but the taste is o.k. and others love it. :D
And that's more important, right?

That makes me urging to find for more of new recipes. So I browsing the web for new books and finally I buy online 12 new cookbooks!!
Oh my God.. I can't believe what I've done. o . o '

Let's see what recipe that I will come up to after reading all 12. :)